If you are with an IPTV provider and suffer from some freezing and buffering then the problem can be that your ISP (Internet Service Provider) can be doing something called “Bandwidth Throttling”.
If you want to be sure you are getting the best IPTV with no freezing then make sure you sign up with one of best iptv usa provider so you can be sure you will not get any future issues
In this guide, we will cover how to fix this by using a VPN or help it by changing the DNS settings on your IPTV device.

Previously this was called net neutrality but bandwidth throttling can affect many IPTV users and cause freezing especially around peak hours when your watching your IPTV streams.
Bandwidth throttling has become more common throughout the years due to the many different types of content we consume online from IPTV, Netflix, Video websites, and torrenting.
Sehen The Best IPTV Tools to use for your IPTV service.
What Is Bandwidth Throttling?
Bandwidth throttling is a method your internet service provider uses to purposely slow down your bandwidth speed to minimize bandwidth congestion and regulate traffic better on their network.
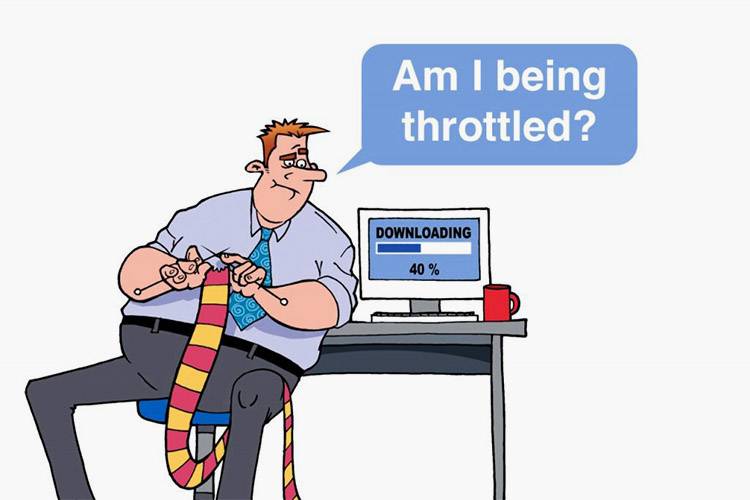
But as an end-user, this can be annoying if you notice this may be happening to you as it will cause problems for you when you are trying to watch IPTV and other content online but there are some fixes.
Before we get into how to fix bandwidth throttling first we will cover how to see if your bandwidth is being throttled by your internet provider.
Sehen How To Find Your IPTV Provider’s IP Address From Their Server Domain Name.
How To Know If Your Internet Provider Is Throttling Your Bandwidth
Luckily this isn’t too hard to figure out, especially if you are getting IPTV freezes, stutters, and black screens. Or Netflix or Youtube problems.
The first thing you should do is notice the time, is it peak hours or weekends when this is happening? As most bandwidth throttling will happen around weekends, evenings, and holidays.
Now if you suspect your bandwidth is being throttled you should head here to https://fiber.google.com/speedtest/ and run a speed test to see if your download and upload speed is close to what you signed up for with your internet provider?
If you are getting quite considerably lower speeds than what you’re paying for then there is a very high chance your bandwidth is being throttled.
How To Fix Bandwidth Throttling?
The only 100% way to stop bandwidth throttling is to use a VPN as this will secure and hide your internet data packets which will completely stop bandwidth throttling.
You will need to use one which works well with IPTV, we highly recommend using this VPN below which works great with IPTV and allows multiple connections for your IPTV devices.
Sehen How To Open Ports For IPTV On Your Home Router
Now if you don’t want to purchase a VPN you can change your DNS settings on your IPTV device which will help not only your IPTV viewing and avoid IPTV stream freezes but will also speed up other content and apps you use on your IPTV device.
Now changing the DNS on your IPTV device wont completely stop bandwidth throttling but it will help a lot and especially if you use Cloudflare DNS settings which we cover in the guides below.
The reason Cloudflare DNS works best is that most IPTV providers are using Cloudflare on their IPTV servers so this lessons any latency when you are watching IPTV streams making them run smoother and fewer freezes if any.
Why Change Your DNS?
Whether you are just wanting to change your DNS for IPTV, we highly recommend you change your DNS on all the devices you use from smartphones, Smart TVs, laptops, and more due to your internet speed getting a slight increase in speed over using your internet providers DNS settings.
So with all the above being said, it’s time to jump in and get to the guides on how to do it on any device you own that you may use for IPTV.
Sehen everything you need to know about Plusnet And IPTV
We will start with the amazon firestick then cover all other types of devices so just scroll down the page now to whatever device you have your IPTV on.
Remember the best method to completely stop any bandwidth throttling is to use a VPN which we mentioned above as this is the only true fix.
If you don’t want to buy a VPN subscription then follow the below to change the DNS which will help and may eradicate any IPTV problems for you such as freezing etc.

How To Change DNS On A Amazon Firestick
To begin with, you will need to grab a few details about your internet network so you can enter them on the firestick. So first using your smartphone head over to this app called IP Tools and download it on your android smartphone or iPhone.
Once you have downloaded the app make sure your smartphone is connected to your home wireless network that your firestick is also connected to them open the app.
Run an IPTV Internet-Geschwindigkeitstest now to see what resolutions you can watch IPTV at.
Now scroll down in the app to the section just under the word Proxy lists and write down these 2 settings below
Broadcast address
Gateway
Now you can close the app and head over to your firestick as it’s time to change the DNS settings on your firestick.
Ok follow the below steps to change the DNS settings on the firestick:
- Drücken Sie Home "Button on the firestick remote
- Weiter zu Einstellungen
- Click inside Netzwerk
- Wähle Deine Wifi network and click the 3-lined icon on your remote to forger the network
- Now press ok on the network and enter your Wifi password in but do not click connect
- Once you have entered your Wifi password in, click on Advanced
- Now you will see it say “Enter the IP Address“
- First, check the broadcast IP you wrote down earlier does it start like this 192.168.0, or is it like this 192.168.1
- You will need to enter your IP address same as the broadcast IP but change the last digit or digits to 249
- So if your broadcast IP address is (example) 192.168.1.255 enter this IP address in the firestick 192.168.1.249
- Alternatively, if your broadcast IP is (example) 192.168.0.255 enter this IP address in the firestick 192.168.0.249
- Once you have entered the IP address in your firestick using one of the last 2 steps then click Weiter
- For the Gateway enter the IP address you wrote down earlier, the gateway then click Weiter
- Now for the Network Prefix, Length enter 24 and click Next
- Now we have arrived finally at the most important part the DNS settings for this we will use Cloudflare DNS as this works best for all IPTV providers make sure to enter the DNS settings below correctly
- For DNS 1 enter this 1.0.0.1 (make sure to put the dots between the numbers) now click next
- For DNS 2 enter this 1.1.1.1 (make sure to put the dots between the numbers)
- Once done click Connect
Sehen All You Need To Know About Using Different IP Address IPTV
Ok, that’s it pat yourself on the back as that was quite some steps but luckily you will never need to do this again unless you somehow accidentally click on forget network or you use another wifi network in the future.
You can press the home button then go into your IPTV app and watch the streams without many freezes or none at all and also watch other content on your firestick with more fast speeds and a smoother internet-based experience on your favorite streaming apps.
How To Change The DNS On A LG Smart TV
- Drücken Sie menu on the LG remote and go into Einstellungen
- Scroll down to Network then choose Network connection
- Klicke auf Set Expert
- Under the IP mode choose Dynamic
- Then under DNS server select Manual
- Now enter these DNS settings in below
1.0.0.1 oder 1.1.1.1
Now that’s it, simply restart your LG smart TV and the DNS settings will be saved and be in effect giving you a better IPTV experience.
How To Change The DNS Settings On A Samsung Smart TV
- On the Samsung remote press Menü
- Gehen Sie nun in Einstellungen
- Wählen Sie Netzwerk
- Wählen Sie nun Network Status
- You will see 3 buttons. Select IP Settings
- Select DNS Setting and choose Enter Manually
- Enter the DNS settings below
1.0.0.1 oder 1.1.1.1
Now restart your Samsung smart TV for the new DNS settings to take effect.

How To Change The DNS Settings On A Sony Smart TV
- Drücken Sie die Home "Button on your Sony TV remote
- Wählen Sie Network Setup
- Auswählen Expert
- Wählen Sie das Wireless oder Wired LAN you are connected to
- Auswählen Status Info
- Write down your IP address on a piece of paper
- Gehen Sie zurück zu Netzwerk und wählen Sie Advanced Options
- Klicke auf IP Settings
- Wählen Sie Static
- Now enter the IP address you wrote down in step 6 but after the last full stop put this number instead 249 so your IP address should look like one of these 192.168.0.249 oder 192.168.1.249
- Klicken Sie nun auf Weiter
- In the Gateway enter the IP address of your router if you don’t know what it is follow the steps in the Changing DNS Settings for firestick further back in this guide
- Now enter in 24 for the Network Prefix Length and click on Next
- Now enter this DNS setting 1.0.0.1 for DNS1 and click next
- Now for the DNS2 enter this DNS in 1.1.1.1 and click Next
- Now press OK
Now you just need to restart your Sony Smart TV for the DNS settings to be applied.
Sehen How to Stop Internet Providers From Blocking IPTV.
How To Change The DNS Settings On A Apple TV
- Drücken Sie die Einstellungen button on Apple TV remote
- Gehen Sie in Netzwerk
- Klicke auf Netzwerk again
- Wähle aus Wifi
- Wählen Sie das Wifi network you’re connected to
- Scroll down and select Configure DNS
- Wählen Sie Manual from the option of Automatic or Manual
- In the DNS server address enter this DNS 001.000.000.001 and save the settings
- Now go back to the main screen and choose Einstellungen und Sleep
- Unplug your Apple TV and wait for 10 seconds then plug your Apple TV back into the power socket
That’s it your Apple TV DNS settings have been changed.7

How To Change The DNS Settings On A Apple iPhone
- Weiter zu Einstellungen
- Choose whatever Wifi network you are connected to
- In the DNS field enter these DNS server addresses 1.0.0.1 und 1.1.1.1
- Go a step back to Wifi to save the settings
How To Change The DNS Settings On A iPad
- Gehen Sie in Einstellungen on your iPad
- Klicke auf Wifi then the wireless network you are connected too
- Enter these addresses in the DNS server address 1.0.0.1 und 1.1.1.1
- Gehen Sie zurück zu Wifi to save the settings

How To Change The DNS Settings On A Android
- Gehen Sie in Einstellungen on your Android device
- Auswählen Wifi and press and hold on the Wifi network to a dialog box appears
- Wählen Sie Modify Network Config
- Check Show Advanced Settings
- Change the IP-Einstellung an Static
- In the DNS1 und DNS2 enter these 2 addresses below
1.0.0.1 und 1.1.1.1
Now that’s it, just simply restart your device for the settings to take full effect.
How To Change The DNS Settings On A MAG Box Device
- Gehen Sie in Einstellungen on the Mag device
- Auswählen Systemeinstellungen
- Klicke auf Netzwerk and press on Auto(DHCP) to change it to Manual DNS
- Enter these DNS settings in 1.0.0.1 oder 1.1.1.1
Now simply restart your mag box and now your Mag device will be using the new DNS settings.
Use A VPN Router
As we mentioned earlier on in this guide the only true 100% way to avoid IPTV issues and ISP bandwidth throttling or IPTV blocks is to use a VPN.
A good way of doing this is buying a wireless router that has VPN capabilities built-in or a dedicated VPN router.
Doing this method will allow all your devices and computers in your home to run on a VPN avoiding any bandwidth throttling issues and IPTV problems.
Fazit
It’s always best to change the DNS on your IPTV device even if you do not intend to use the device for IPTV.
This will give you the best Internet speeds and low latency so you will be able to see a nice performance increase on your device whether you are watching IPTV, Netflix, Youtube, or browsing the web.