So you have got sick of most of the unreliable Kodi streams with their stopping and starting or not working at all and want the best stable IPTV out there. Well, you’re in luck as we have put together a guide on how to install IPTV on Kodi so that you can enjoy all the TV and live streams without a hiccup.
Alternatively, if you are using a PC for this you may want to follow our guide on installing IPTV for windows pc as the app will work better than Kodi would do for a pc based on windows.
![]()
Download and Open Kodi
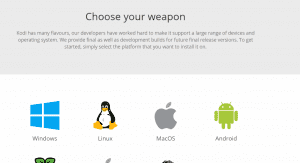
First things first you will want to download Kodi from their official website if you have not already by going here https://kodi.tv/download and picking your operating system towards the bottom of the page and downloading Kodi.
Next, you want to open it and follow the steps below. If you already have Kodi then just follow the next part
Activating Live TV & PVR
Quick Tip: Press the \ key to make Kodi go into a small screen so you can follow this guide then once finished press \ again to make Kodi go full screen
Once you have opened Kodi you will want to head over to the Add-ons which is 7th down the list and once inside go to my add-ons and you will see it say PVR clients then click on it.
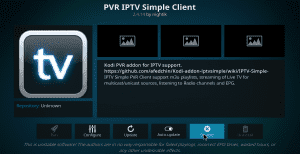
Now you will see many PVR clients but the only one we are interested in is the one called PVR IPTV Simple Client so you will want to click on it which will bring us to the next part.
Setting Up The PVR IPTV Simple Client
First, you will want to Buy Our IPTV Subscription here so you can add our M3U file by following the below.
Once you have downloaded an M3U from us by buying a subscription you will now want to go to configure and then you will want to go to the first tab called general and make sure the location is set to Local Path (Include Local Network).
Now just under that, you will want to click on the M3U Play List Path which will bring a directory like the picture below
Now to get to the M3U file you have got off us you will want to find it by clicking the C drive and then going to users and picking your PC user and then going to Downloads or Desktop wherever you have downloaded the M3U file to.
If you are using an android box or similar you will find the M3U file in the downloads folder or you can put it on a USB stick and plug the USB into the android box and locate it that way.
Once you have found the downloaded M3U you will need to click on it then click ok again on the right-hand side of the screen.
Now make sure you click the enable button at the bottom of the screen to enable to PVR IPTV plugin then once its enabled press the right mouse button to go back on a PC or if you are using a remote press the back button.
You will see all the PVR add-ons this is normal just make sure you see a tick next to the PVR IPTV Simple Client and now close Kodi by clicking the x in the corner on PC or by hitting the back button all the way out on an android box etc.
If you have an Xbox One then check out our guide on how to install Kodi on it and the best current Kodi Build.
![]()
Time To Open Kodi Again
Once you have opened Kodi again you will see a new section called TV which is 5th down the list press ok on it and you will now see all the channels and that’s it all done.

We strongly advise using another app such as Smart IPTV if you are using an amazon fire or a Smart TV, or if you have an android box its best to use Perfect IPTV Player instead of Kodi as Kodi can be a bit buggy sometimes with the PVR plugin.
Related Articles:
How To Install IPTV On Amazon Firestick
How To Put IPTV On Perfect IPTV Player
How To Install STB Emulator For Firestick & Android Devices
Download IPTV Extreme To Your Firestick
Go back to Strong IPTV homepage